![]()
BITBOX USER’S MANUAL
Contents
- Getting started with BitBox software
- USB Dongle
- About BitBox
- Running BitBox
- Menu bar
- Errors and warnings during reading/writing
Getting started with BitBox software
In this document you will get information on how to start work with BitBox software, how to get installers, how to install and how to start your work with it. Also, we try to explain the main rules and procedures you will have to deal with.
Before starting working you should understand what you need and what requirements for BitBox and BitEdit software.
System requirements:
- Internet connection required during all time working with software
- Senselock dongle and driver…*
- Windows 7 or later…**
- 2GB RAM and more…
- At least 100MB of free space for BitEdit and BitBox
- .NET Framework 4.0 and later, but recommended to use always latest version
- J2534 device from tested list for BitBox(you can see it in BitBox part of this document)
*You cannot run any of our software without a USB dongle, when you are buying software at first time you will get a USB dongle once and then all modules will be attached to it.
USB Dongle
We are using a security USB dongle from Senselock company. To use it you should install USB drivers.
You can download driver from link below:
https://senselock.ru/download/EL4/drivers/senselock_windows_5.3.0.0.7z
About BitBox
BitBox – is the software that allows you to work with vehicles through the J2534 device for reading/writing engine and transmission ECU’s. In BitBox, the default package J2534 device is not included, and you have to buy it if you don’t have it!
We strongly recommended using the Scanmatik 2/3 adapter as most stable. Also, it has some features that are not supported by other adapters, because of this, some modules only work with these adapters, such modules are marked as [SM2/SM3 ONLY].
List of tested J2534 device:
- Scanmatik SM2/3
- DrewTech CarDAQ+, CarDAQ 2
- DrewTech Mongoose JLR/Chrysler
- Bosch Ford VCM-II
- Tactrix OpenPort 2.0
To start working with BitBox you need to install drivers for the USB dongle as shown in the USB dongle part of this document. After that you should have a J2534 device and already installed drivers for it.
If you have already done these steps you can download BitBox by this link:
http://archive.powertuner.net/bitbox/Setup.exe
This link is always available, also you can get download from our User Portal.
Running BitBox
After installation, you will get shortcuts in Start Menu and on Desktop (if you checked this option during installation). Run BitBox using a shortcut as usual. You can see a message saying that you should select J2534 device, as shown at Image 1.
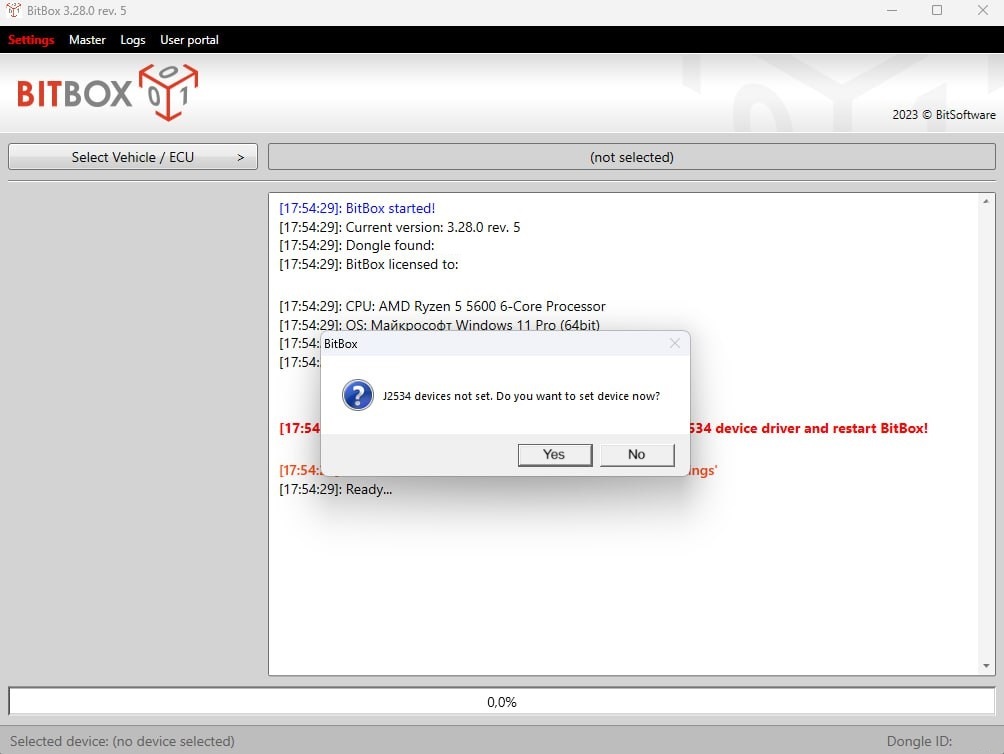
Image 1. Started BitBox at first time
Press ‘Yes’ and select device from list:

Image 2. J2534 device selection
Also in settings menu you have additional settings such as “Options” and “Boot pin”
“Options” have 3 checkboxes:
- Virtual read: Always download the latest update. This option allows downloading the latest firmware update in modules that have “virtual read” option.
- Filename: Add VIN to filename. This option allow to add the VIN to the automatically suggested filename to save after reading the ECU
- Filename: Add date/time to filename. This option allow to add date/time to the automatically suggested filename to save after reading the ECU
Boot pin settings allow selecting OBD PIN 9 or OBD PIN 12. You should select the correct OBD pin for the additional adapter that is required for those modules that use the boot signal in connection to an ECU.
OBD PIN 9 – required for BITS001 additional adapter.
OBD PIN 12 – required for any other additional adapter.
Click the "Apply" button to save the settings after you select the ones you need and to continue working with the program. Then you should select a family or vehicle to work with.
Your personal Dongle ID is always shown in the bottom right part of the window, if you don’t remember it – just run BitBox and you will see it!
Also in the bottom left part you see the selected J2534 device.
You can change your J2534 device at any time when the BitBox application is in idle state by pressing the “Settings” menu in the top menu.
Now press “Select Vehicle / ECU” and you selection dialog will show
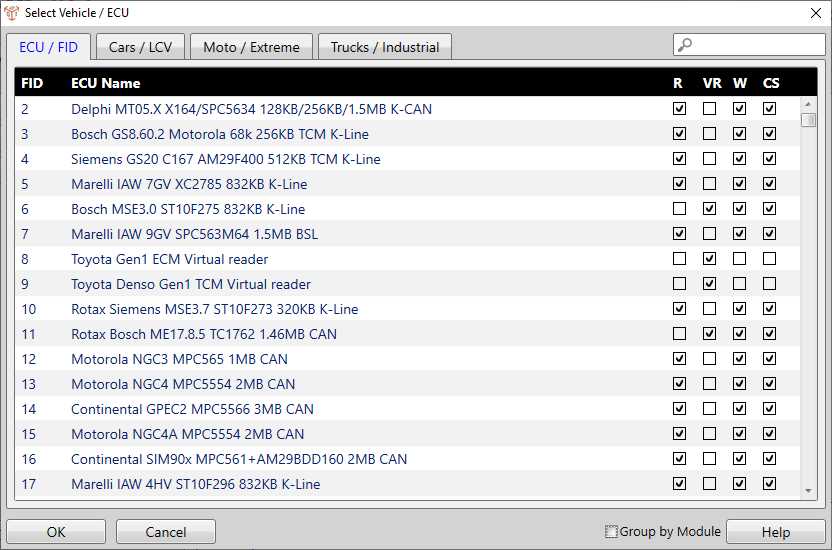
Image 3. Select Vehicle / ECU
You can select by ECU type, if you already know what family you need, or By Vehicle using a car list. In the ECU list you can use the search entering test in the search field and top right corner of the window. During entering the list will be filtered.
Also, you can check the “Group by Module” checkbox to group FID’s by module.
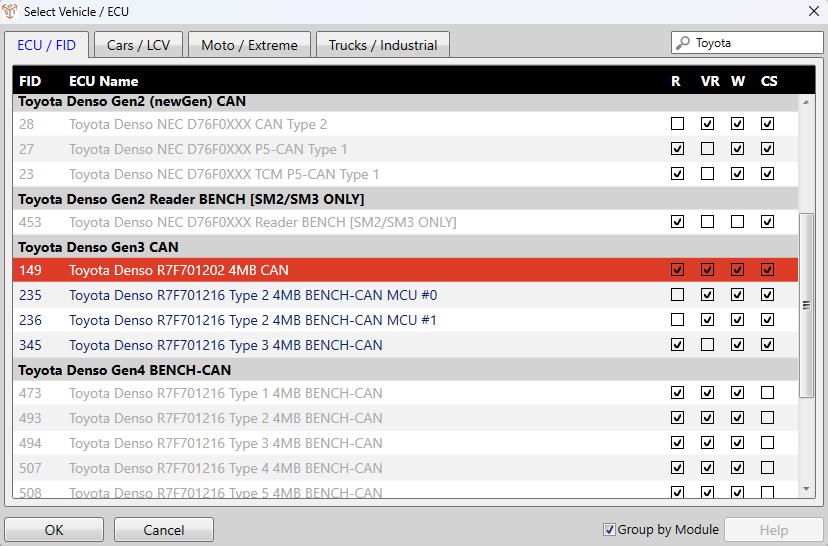
Image 4. Group by Module
In the vehicle list you should select Brand / Model and then select the vehicle you need and family will be selected.
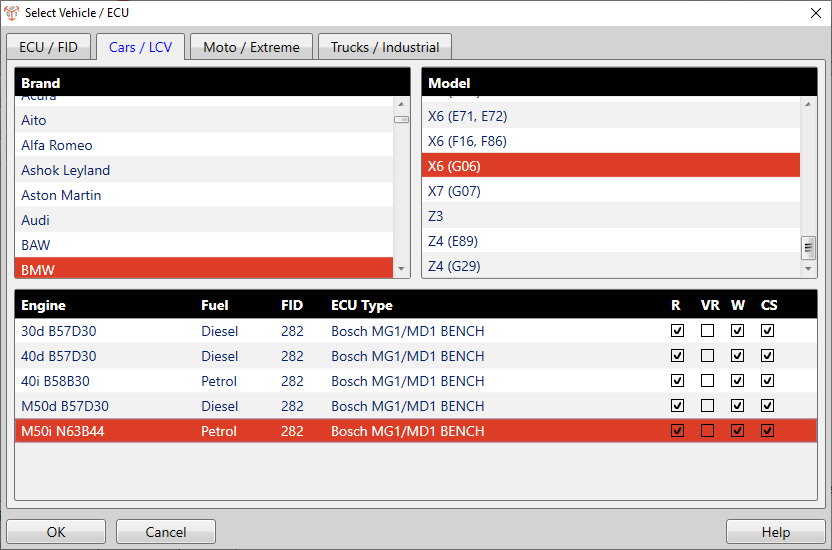
Image 5. CarList
The modules that you have activated will have a blue text color, and the modules that are not activated will have a gray text color.
Some FIDS allow you to take identification without buying a module. These FIDs will also be available for selection, as will the purchased modules. If the FID cannot be selected, it means that it does not support identification when the module is not purchased.
We would like to draw your attention to the fact that an unpurchased module may give partial identification, for example, the ECU protection status will not be displayed.
Please note on this part of window:

Image 6. R/VR/W/CS
-
R – Reading shows you that this family supported regular reading data from ECU. It means that you can get real data stored in ECU at this moment even when there is no original file!
-
VR – Virtual reading shows you that this ECU cannot be read, but we provide the original file from our server reading identification from ECU. In this case YOU ALWAYS GOT ORIGINAL FILE, even if the vehicle is already modified you will get the original file. We have a lot of files in our database and continue to fill it, but in some cases there are no files found in our database. THEN READING IS NOT POSSIBLE!
-
W – Writing shows you that this family supports writing files through the J2534 device. You can write a binary file corresponding to this family.
-
CS – Checksums calculation shows you that our application will automatically check and fix checksums if needed during writing file, and after reading (if reading is available).
Now look at Image 7. You see BitBox when selecting a family. You see available options at the left part of the application.
-
Identify – read identification from vehicle or ECU
-
Read – use reading features. If reading available ECU will be read, if available virtual reading – file will be downloaded if it is available on our server.
-
Write – writing binary file to ECU or vehicle.
-
Recovery – this feature used when you have problems during regular writing and the writing feature does not work and ECU is dead. In most cases the recovery option uses a special algorithm but in some cases you need to modify the ECU to use ‘Recovery’. Just see manual to this family
-
Help – open user manual how to work with this family and what special information you need to work.
-
Remove protection – see user manual
-
Read EEPROM/Coding – read EEPROM/Coding data from ECU
-
Write EEPROM/Coding – write EEPROM/Coding data to ECU. Use Read/Write EEPROM/Coding features only if really needed or during the recovery process! It may cause loss of immobilizer data!
-
Read DTC – read current fault codes
-
Clear DTC – clear fault codes
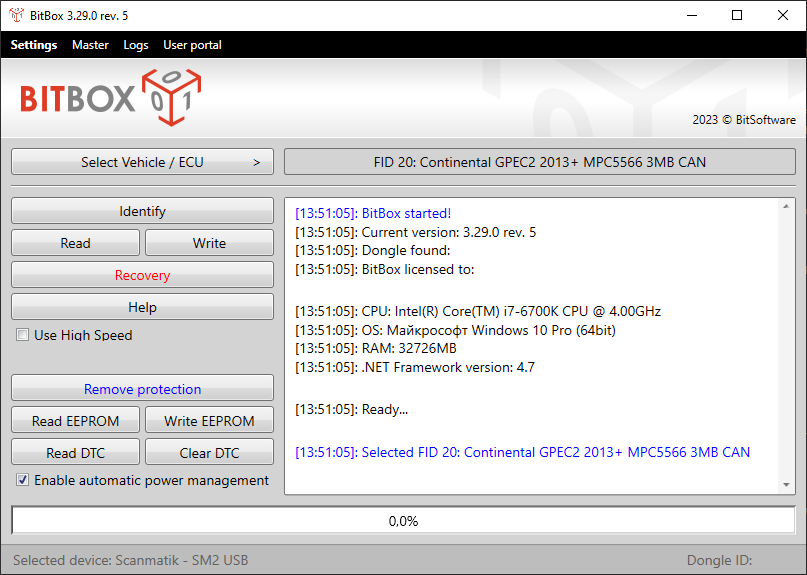
Image 7. BitBox with selected family GPEC2 2013+
In some cases you will also see checkboxes: Use High Speed – allows you to read/write at high speed, in some cases this cannot be done, so this feature is disabled by default.
Menu bar
You can see 4 buttons on the menu bar. There are: Settings, Master, Log, User portal.
![]()
Image 8. Menu bar
Settings – if you click on this button the settings menu will open. In this menu you can change your current J2534 device, Boot pin, and other options.
Master – if you click on this button the master menu will open. The Master menu allows you to work with requests from your clients who use the slave version of the program.
Logs – if you click on this button the logs menu will open. The log menu has 5 buttons. There are:
- Check support request – allow you to send all log files to support by support request.
- Open Logs folder – allows you to open folder with all your log files.
- Save log file as… – allows you to save the current log file.
- Send logs to support: Today – allows you to send all logs for the current day to support.
- Send logs to support: 2 days – allows you to send all logs for the last 2 days to support.
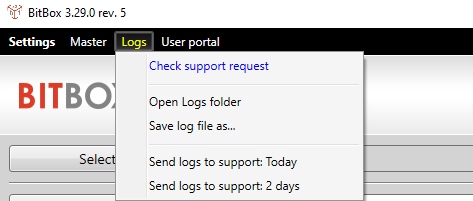
Image 9. Logs menu
User portal – if you click on this button, your page in the user portal will open in the browser.
Errors and warnings during reading/writing
If you have an error during the reading/writing process we can help you only in case you contact us to support a full description of the problem. Here are required data from you to contact to support in these cases:
- Full information about Vehicle: Brand, Model, Model Year, ECU type
- Screenshot of your problem
- Detail explanation about how you got this problem, what you have done before
- Log file.
You can obtain the current log file by right-clicking at the log window and using “Save log as…”. Also, you can open the Logs directory using the Logs menu on top of the window and select the last created file or some files if you reopen the application several times!
Using this package of information we can quickly understand what problem you have and find a solution.
Support messages, which contain: “Does not work!”, “Fail”, “Cannot read” and other short messages will be skipped or put at the end of the queue!